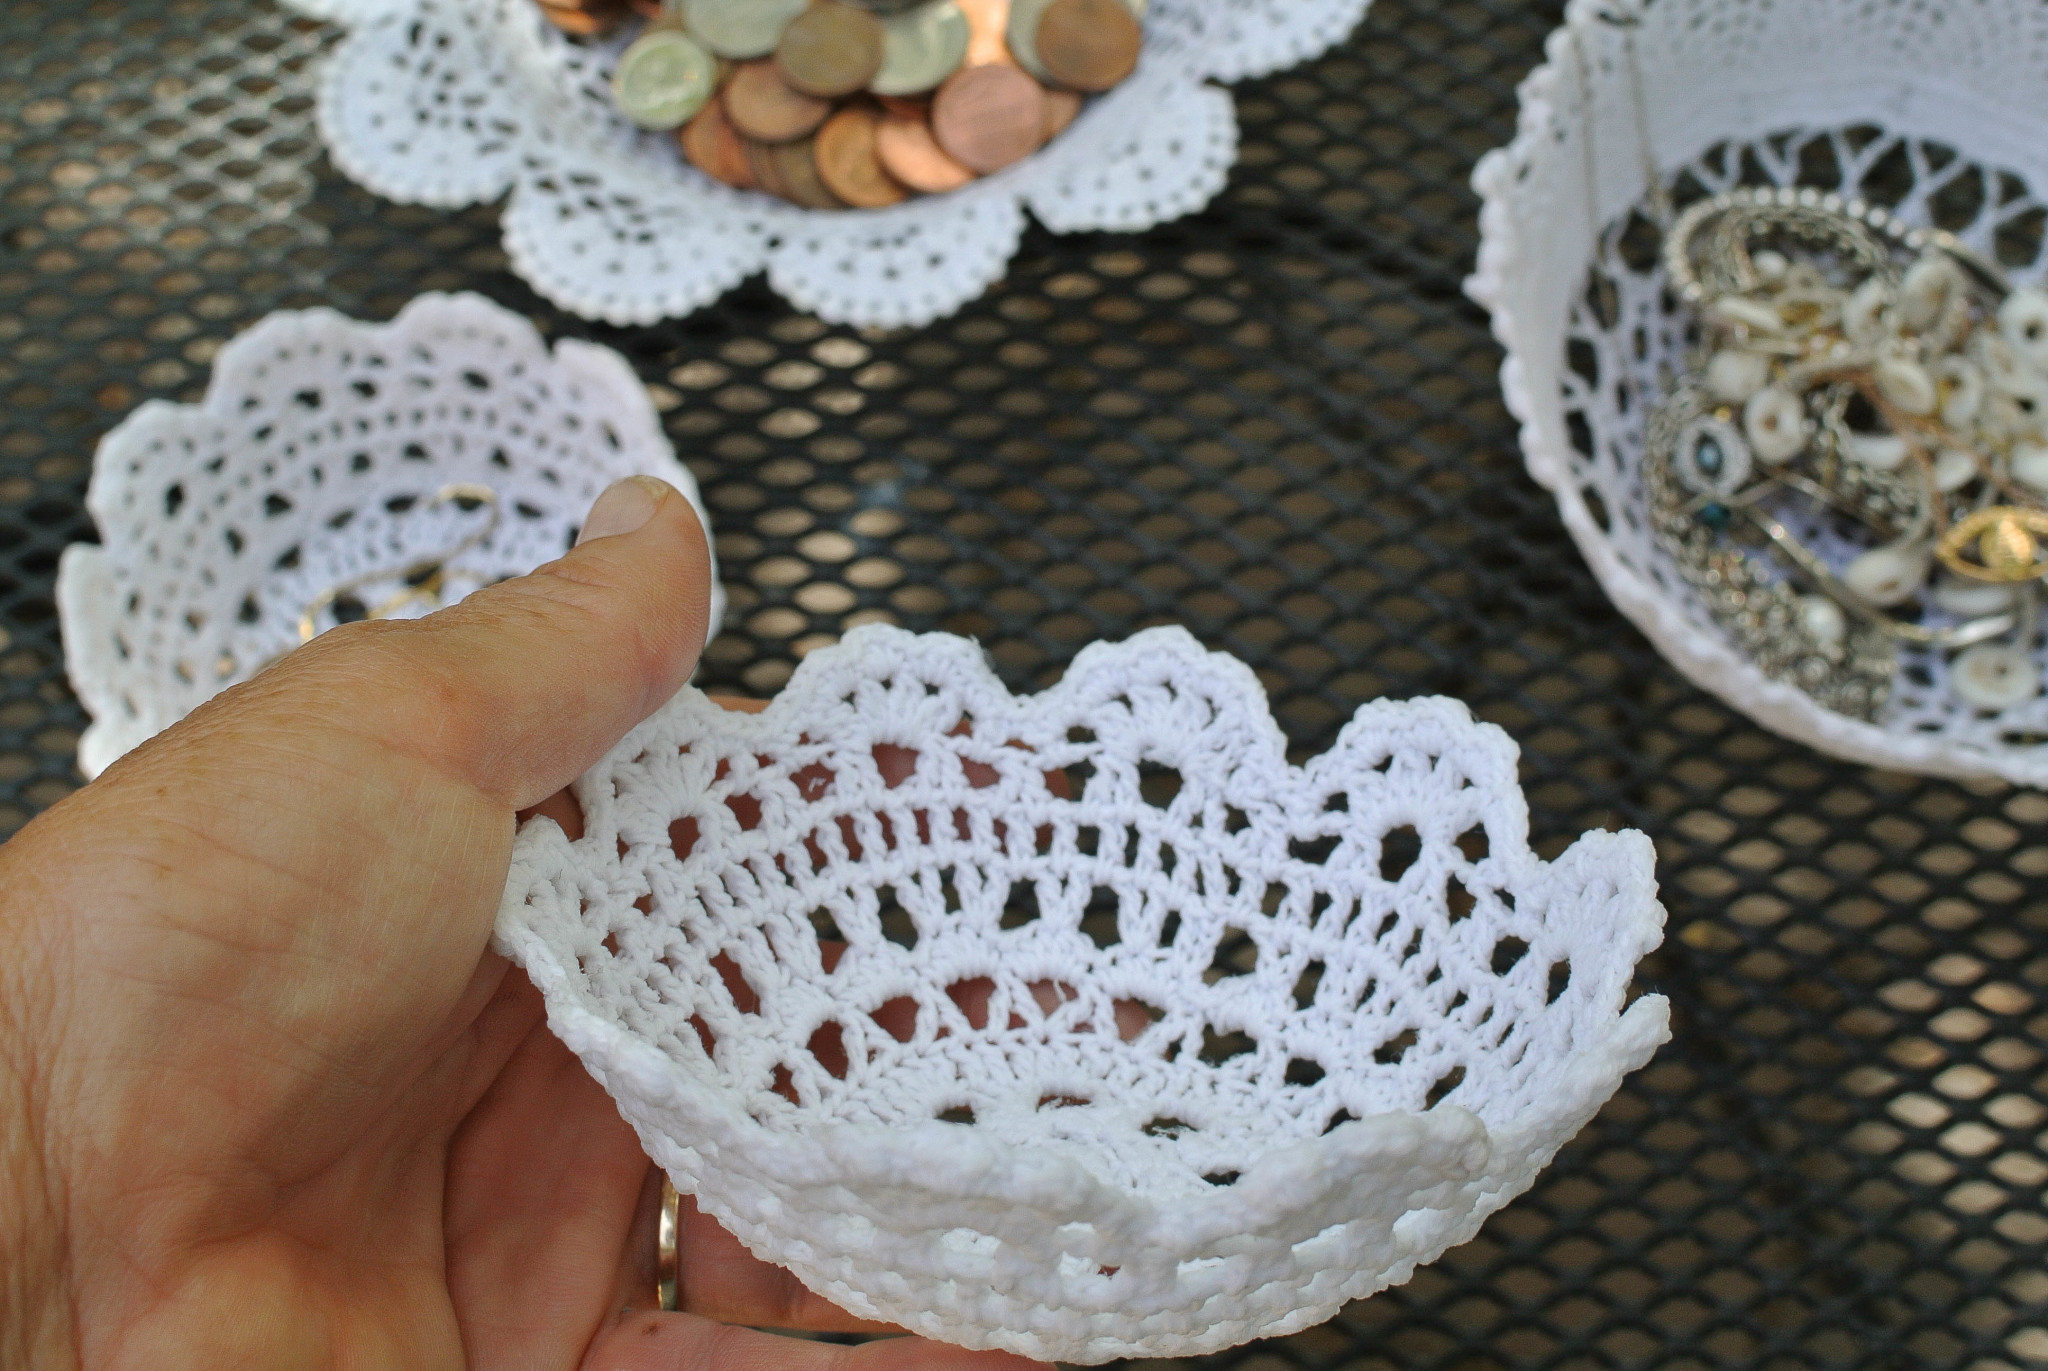
 For some reason I’ve been wanting to make these little doily bowls for a while. It’s quite silly how easy these little bowls are to make. I’m mean, it’s probably the simplest DIY project out there. And now, I have four new cute bowls about the house to fill with those random left items that need a home like coins, jewellery, match boxes. Here are the easy directions including the removal–which was a step missing from some of the other directions I found online and pinned to my Kremb de la Kremb To Do DIY Board. (Check it out for a peek into my inspo….)
1. Gather the Supplies:

At Joann’s I collected an assortment of 4 different doilies. (Now that I know how to make bowls out of them, I’ll be on more of a watch for unique doilies in second hand and vintage stores.) I also picked up a big bottle of a product called Stiffy. It’s a fabric stiffener. I gathered some bowls as molds, a bowl for the stiffy, and plates to place the bowls on.
2. Setup the Bowls and Plates.

Fill one of the bowls with some stiffy. I’d say each doily uses about 1/2-3/4 cup. Also lay out your bowls face down on plates. I had four doilies so I set up four bowls upside down.
3. Completely Soak the Doily.
 Immerse one doily at a time into the Stiffy glue. Really saturate the doily with this fabric stiffener. I gave each doily a good 10 to 20 second immersion in the stiffing liquid.

4. Lay the Doily Over a Bowl.
 Now, without worrying about all the excess liquid, lay the doily evenly over a bowl. Try to place it so that the center of the doily is on the bottom side center of the bowl. Once it’s placed how you like it, really spread the doily out evenly, pushing it on to the bowl.

5. Let the Doilies Dry Over Night.
 I was able to place my four doily bowls in the sun, but this isn’t necessary. Letting them dry at least 12 hours is fine.
6. Spoon the Doily Off.

This was the step that I found missing in the directions I found online. One post said to put plastic wrap between the bowl and doily, but I skipped that. Instead I used a spoon to wedge in between the doily and the bowl. Slowly and surely, I worked my way around the bowl going deeper as I went. Eventually I got to the point where the doily came right off–shaped as a bowl.
That’s it! It was so easy. Aside from the drying, creating these bowls took about ten minutes. Next up I’ll try dying them. These little bowls would be great to use at Christmas filled with yummy treats. For now, I’ve got four of them around my house filled with earrings and coins. I keep one by my bed for all the keep sakes that could get lost if just left out and about.

Published by